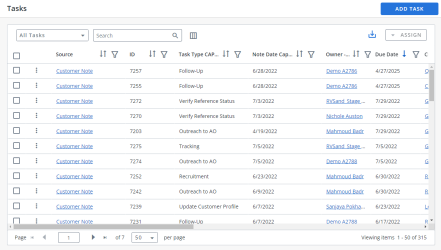
The Tasks tab helps manage reference program activities and follow-up tasks.
Tasks can be manually created or automatically generated when the following events occur:
- Time or usage number limit has been met for a Reference Asset.
- Time or usage number limit has been met for participation by a reference.
- Reference Request has been Completed and must be Confirmed. For more information, see Requesting References .
- Task date is recorded in a Customer Note. For more information, see Editing Customer Information.
Note: If the Task Date and Task Title field are not populated, the note will be associated with the customer account but will not appear in Tasks.
- Navigate to the Tasks page.
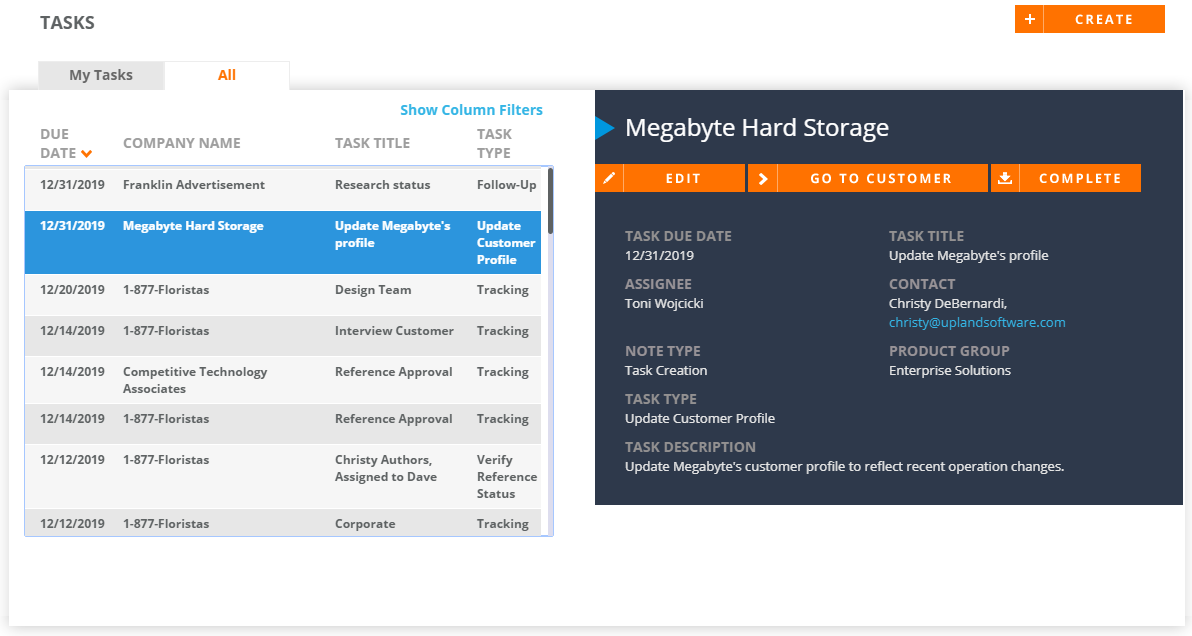
- Select one of the following views:
- My Tasks: Displays all the tasks that you created or those assigned to you.
- All: Displays all Tasks to Reference Managers and Admins.
- Click Show Column Filters to filter the columns (can filter by Company Name, Task Title and Task Type). Click Hide Column Filters to close the filter selections.
- Click the column headers (e.g. Due Date, Company Name, Task Title, Task Type) to sort your Tasks.
- Click a row to view Task details on the right side of the screen.

-
Navigate to the Tasks page using the navigation bar icon,
 .
. 
-
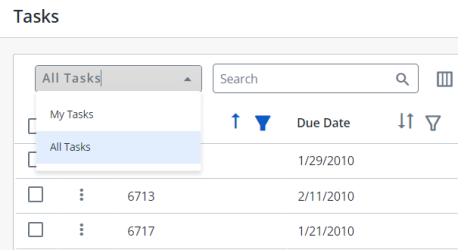
(Optional) Select a preferred View from the drop-down menu:
-
My Tasks: Displays all the tasks that you created or those assigned to you.
-
All: Displays all the tasks available in the instance.
Note: The RO Platform will remember your View selection. The next time you open the Tasks grid, your selected View will be displayed as the default.
-
- To perform a search, enter two or more characters into the search bar and click Enter. Results begin populating below the search bar once text is entered. Click the X to clear your search bar.
- To configure the Columns, click the
 button and click on the Column name in the Available section and click the
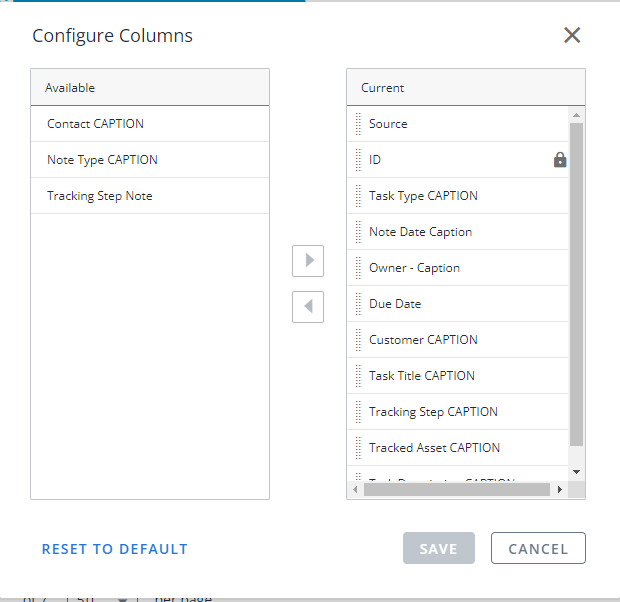
  button to add it to the Current section. You can also rearrange the Columns in the required order in the Current section by dragging the Column name tiles.
 -
The ID column is a default column. You can only rearrange it.
-
Click Reset to Default to go back to the default Column arrangement.
- (Optional) Click the
 button next to the column headers to sort the column from either top-to-bottom or bottom-to-top: chronologically for dates, sequentially for numbers, and alphabetically for text. Your sort selections will be remembered as your default preference. The blue arrow
  next to a column header indicates the type of sorting applied to the column.
 - (Optional) Click the
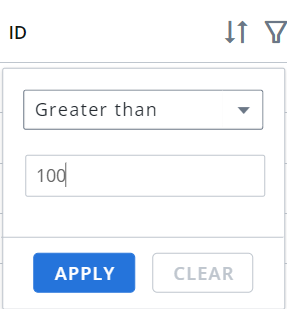
 button next to the column headers to filter what appears in the columns. For example, if you want to filter the IDs, then click on the button and select the range type from the drop-down menu (equals, greater than, lesser than or Is null) and enter a number. Click Apply. To save the filters, refer to Using the Saved Filter.
 - (Optional) Click the
 button to export all the records or the filtered records to excel. The exported records will follow the sorting order and the columns customized in the grid.
 - (Optional) Use the page scrolling controls at the bottom left of the grid to view other pages. To go to a specific page, click in the field, type the page number, then press Enter. Select the number of rows you want to display in the grid by clicking the drop-down menu.

- (Optional) A Source column is introduced that displays where the task is generated from. There are five major categories of Source, as listed below:
Limit Reached - Task created when a limit is reached for Asset / Reference Participation.
Content
Task created when a step is added from "Track content" tab.
Task created when a content asset is expired.
Task - Task created from Tasks page.
Reference Request - Request follow-up when reference request has been “Completed” and needs to be “Confirmed”.
Customer Notes - Task created when a follow-up date is recorded in a Customer Note.
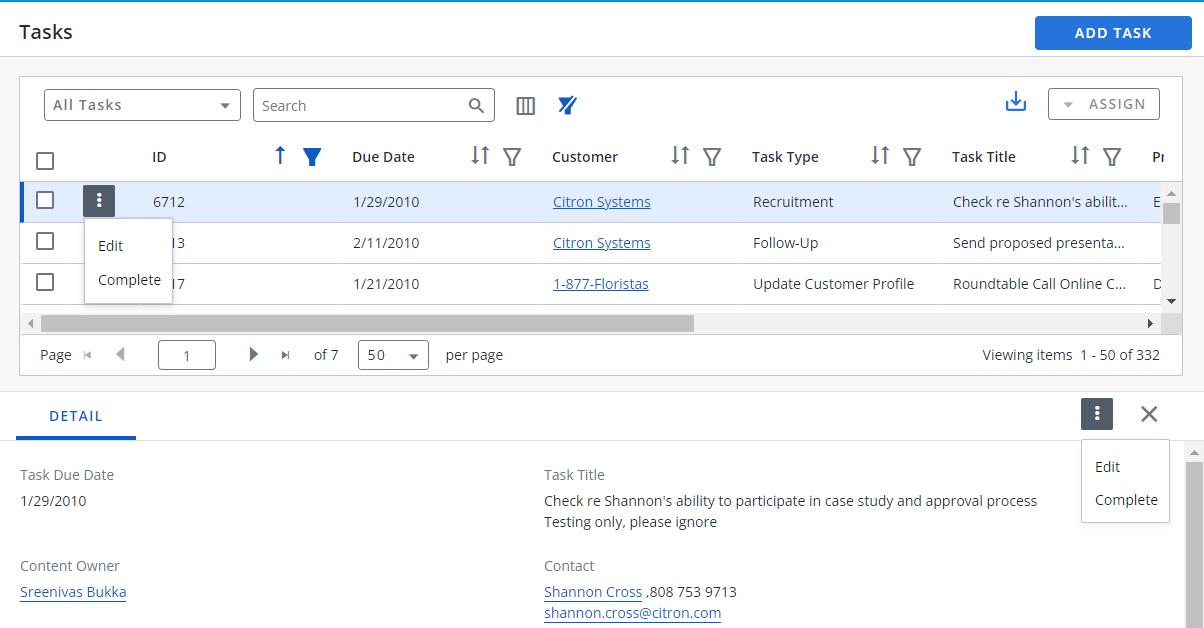
- Click the
 button on any Task to perform one of the following actions:
 - Edit: Allows you to make any desired changes to your Task. See, Editing a Task.
- Complete: Allows you to complete the Task. See, Completing a Task and Complete and Clone Task.
- Click anywhere on the desired Task to view additional details at the bottom of the screen.


Note: If you are an Admin, navigate to Admin > Grid Configuration to set default columns for all users.
Note:
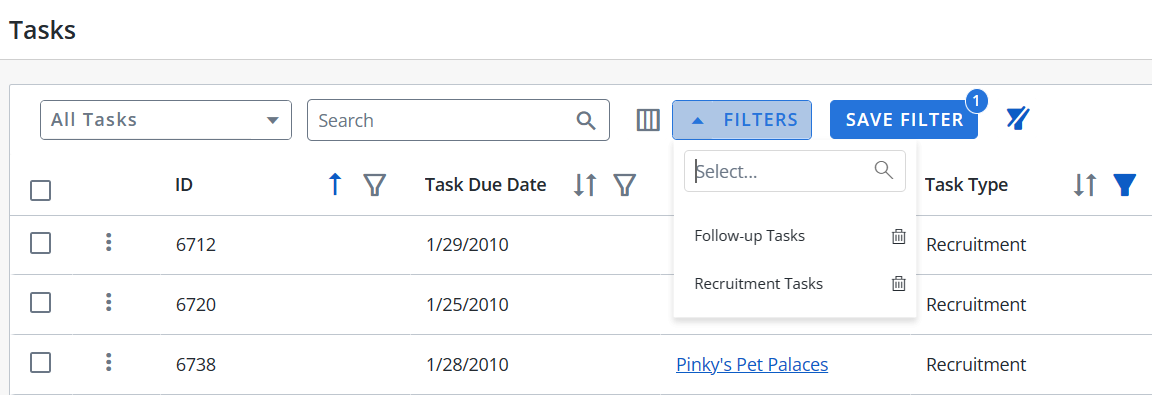
Note: The RO platform will remember your Filter selection even if you leave the Tasks page and return to it later.
Users can filter the columns based on their requirements and save the filters for future use. This allows users to quickly access the information they need and eliminates the need to manually filter columns every time they use the grid.
To create a saved filter:
-
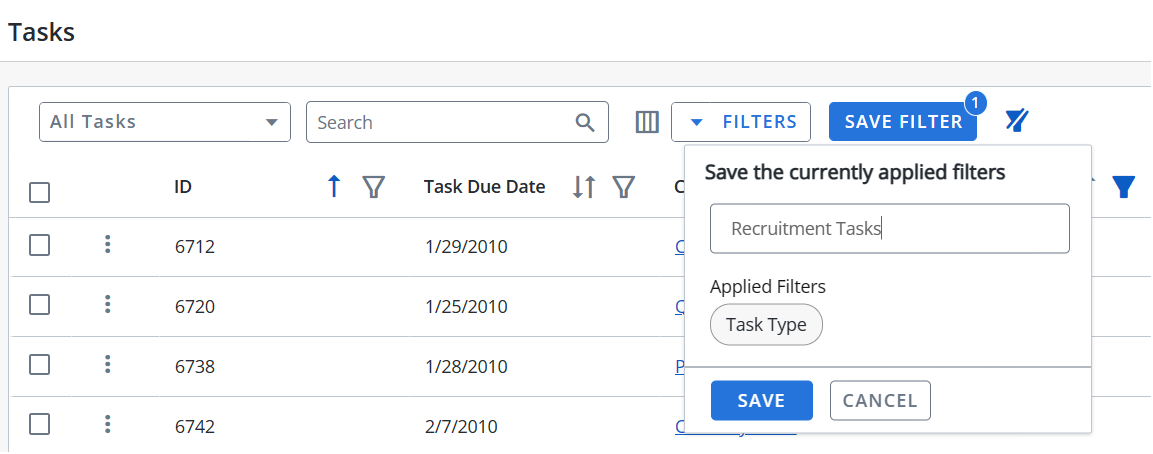
Filter the columns in the grid as desired. The Save Filter button is displayed next to Filters along with the number of filters applied.
- Click Save Filter and enter a filter name. This dialog displays the column names of the applied filters.
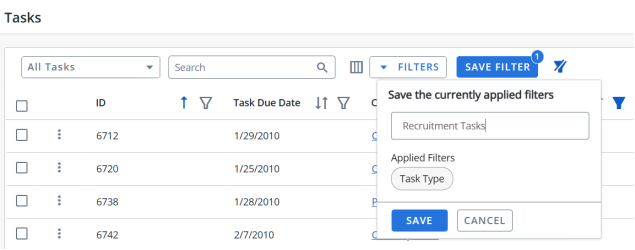
- Click Save to save the filter.
Note: The "Clear All Filters" button,
 , will display once a filter has been applied. Click the icon to clear all applied filters.
 - To find the saved filter, open the Filters drop-down menu and select the desired saved filter.
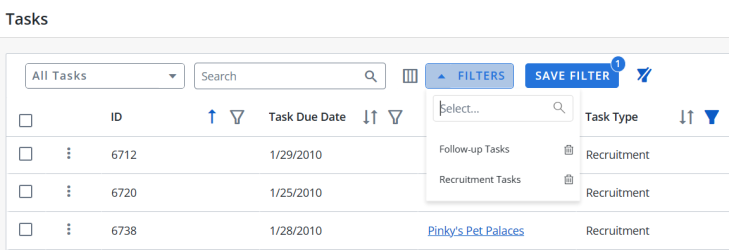
- To delete the saved filter, open the Filters drop-down menu and click
 icon.
icon.
Note:
-
It is not possible to create saved filters with the same filter name.
-
The RO platform will remember your Save Filter selection even if you leave the page and return to it later.
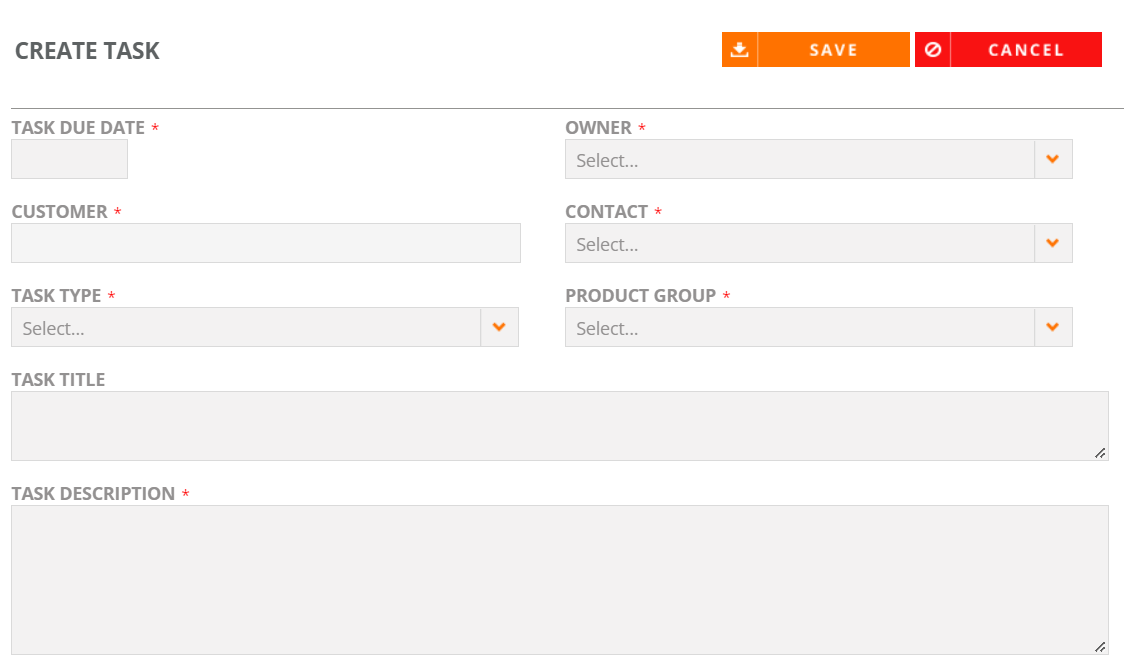
- Navigate to the Tasks page and click the Create button. The Create Task page will appear.
- Add the task details.
- Task Due Date: Click in the field and select the due date from the calendar.
- Assignee/Author: Select the assignee and/or author of the task.
- Customer: Select the customer to which the task is associated.
- Contact: Select the customer contact.
- Task Type: Select the type of task being created.
- Product Group: Select the product group associated with the task. This is an optional configurable field from the Notes area.
- Task Title: Enter a title for the task.
- Task Description: Enter a description of the task.
- Click Save.

Upon creating a new task, a customer note will be automatically logged marking the creation of a new task. The Note Type displays as Task Creation.
- Navigate to the Tasks page and click the Add Task button. The Create Task page will appear.
- Add the task details.
- Task Due Date: Click in the field and select the due date from the calendar.
- Owner: Select the owner of the task.
- Customer: Select the customer to which the task is associated.
- Contact: Select the customer contact.
- Task Type: Select the type of task being created.
- Product Group: Select the product group associated with the task.
- Task Title: Enter a title for the task.
- Task Description: Enter a description of the task.
- Click Save.
Upon creating a new task, a customer note will be automatically logged marking the creation of a new task. The Note Type displays as Task Creation.
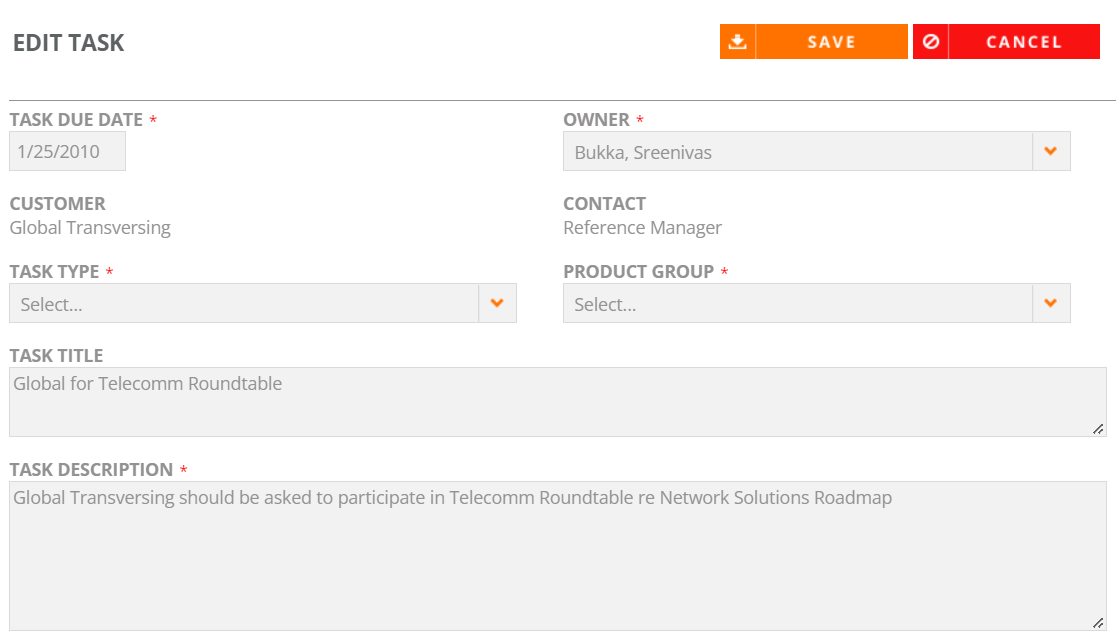
- Navigate to the Tasks page.
- Click the row to display the Task details on the right side of the screen.
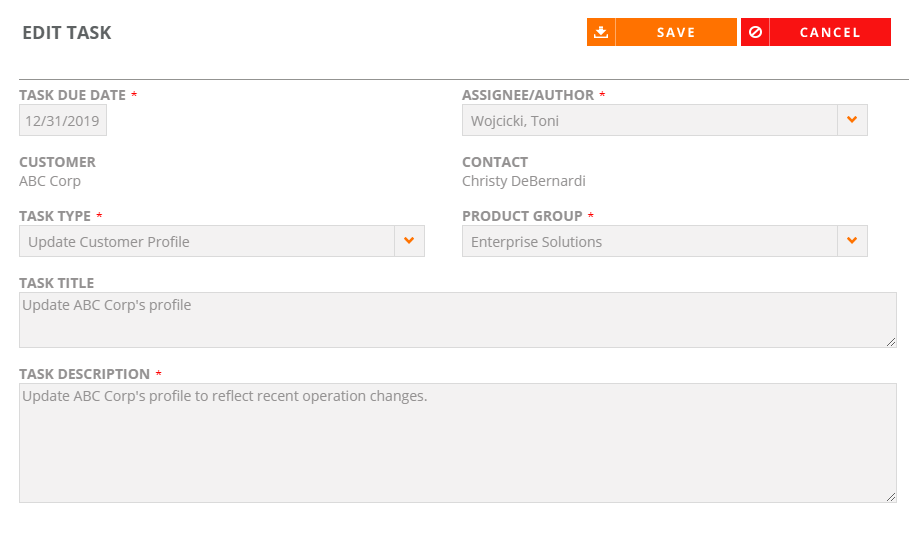
- Click the Edit button. The Edit Task page appears.
- Change the desired task details.
- Task Due Date: Click in the field and select the due date from the calendar.
- Assignee/Author: Select the assignee and/or author of the task.
- Task Type: Select the type of task being created.
- Product Group: Select the product group associated with the task. This is an optional configurable field from the Notes area.
- Task Title: Enter a title for the task.
- Task Description: Enter a description of the task.
- Click Save. Any changes will be updated in the previously generated customer note.
Note: If editing a Tracking Task, see Track Content Tab for more information on editable fields.
- Navigate to the Tasks page.
- Click the button on any Task and click the Edit button. The Edit Task page appears.
-
Alternatively, click the row to display the Task details on the bottom of the screen, click
button and select Edit. - Change the desired task details.
- Click Save. Any changes will be updated in the previously generated customer note.
Note: If editing a Tracking Task, see Track Content Tab for more information on editable fields.
- Navigate to the Tasks page.
- Click the row to display the Task details on the right side of the screen.
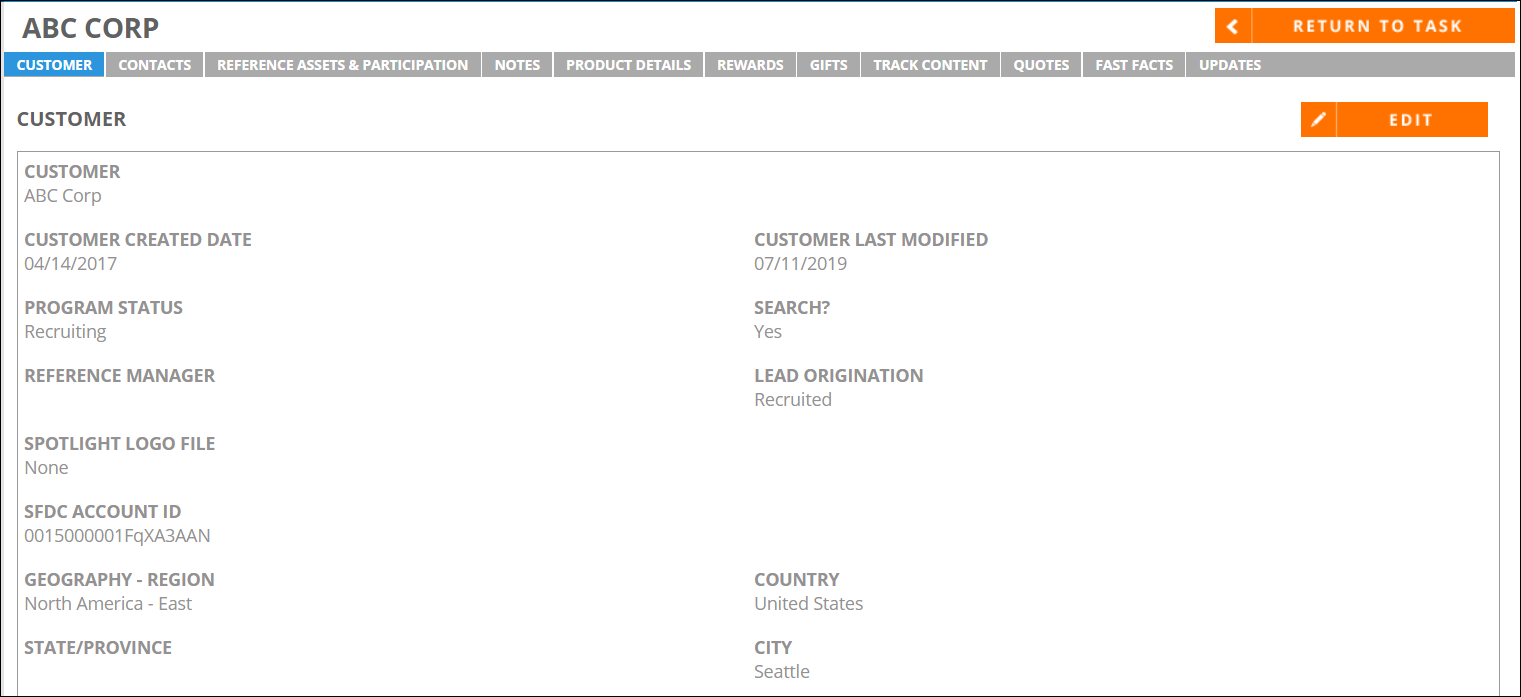
- Click the Go To Customer button. The Customer profile page will appear.
- Click the Return to Task button to go back to the Tasks page.
- Navigate to the Tasks page.
- Click on the Customer Name link on the Customer column to go to the customer profile.
- Alternatively, click the row to display the Task details on the bottom of the screen and click on the Customer Name link .
- Click the Return to Task button to go back to the Tasks page.
- Navigate to the Tasks page.
- Click the row to display the Task details on the right side of the screen.
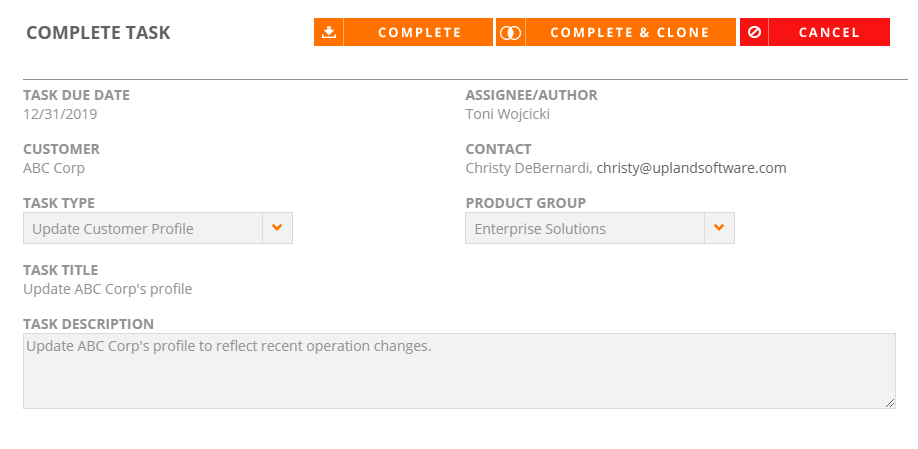
- Click the Complete button. The Complete Task page will appear.
- Update any desired task details.
- Task Type: Select the type of task being added to the task completion.
- Product Group: Select the product group associated with the task. This is an optional configurable field from the Notes area.
- Task Description: Enter a description regarding the completion of the task.
- Click Complete.
Note: The task is removed from the Task Grid; completed tasks no longer appear in the grid. A new note with Note Type Task Completion will be automatically created behind the scenes to mark the completion of the task.
- Navigate to the Tasks page.
- Click the button on any Task and select Complete. The Complete Task page will appear.
-
Alternatively, click the row to display the Task details on the bottom of the screen, click
button and select Complete. - Update any desired task details.
- Click Complete.
Note: The task is removed from the Task Grid; completed tasks no longer appear in the grid. A new note with Note Type Task Completion will be automatically created behind the scenes to mark the completion of the task.
You have the option to mark a task as complete and clone it to create a new task.
- Navigate to the Tasks page.
- Click the row to display the Task details on the right side of the screen.
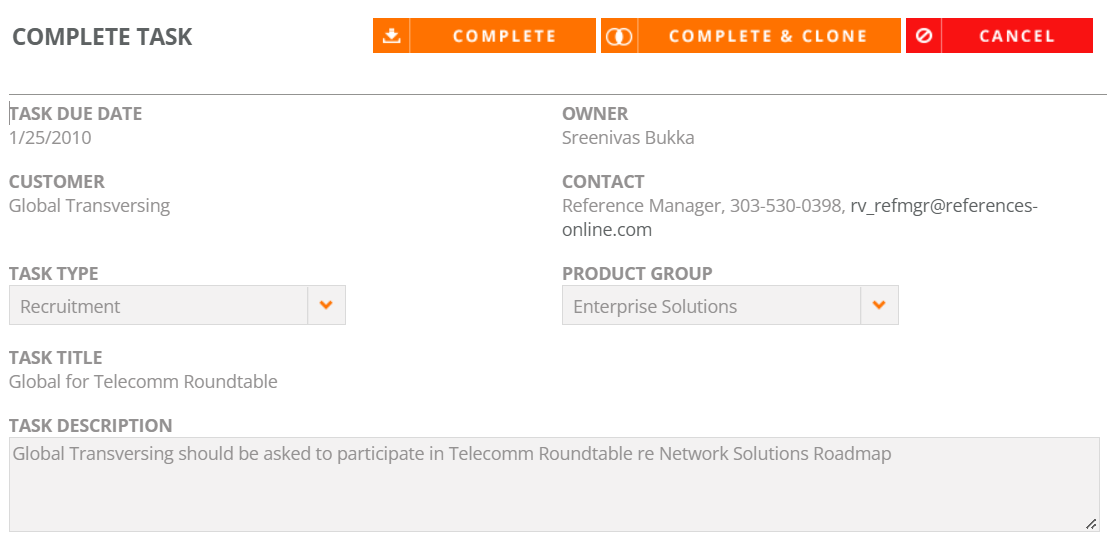
- Click the Complete button. The Complete Task page will appear.
- Click the Complete & Clone button. The Create Task page will appear.
- Add the task details.
- Task Due Date: Click in the field and select the due date from the calendar.
- Assignee/Author: Select the assignee and/or author of the task.
- Customer: Select the customer to which the task is associated.
- Contact: Select the customer contact.
- Task Type: Select the type of task being created.
- Product Group: Select the product group associated with the task. This is an optional configurable field from the Notes area.
- Task Title: Enter a title for the task.
- Task Description: Enter a description of the task.
- Click Save.
You have the option to mark a task as complete and clone it to create a new task.
- Navigate to the Tasks page.
- Click the button on any Task and select Complete. The Complete Task page will appear.
-
Alternatively, click the row to display the Task details on the bottom of the screen, click
button and select Complete. - Click the Complete & Clone button. The Create Task page will appear.
- Enter the task details.
- Click Save.
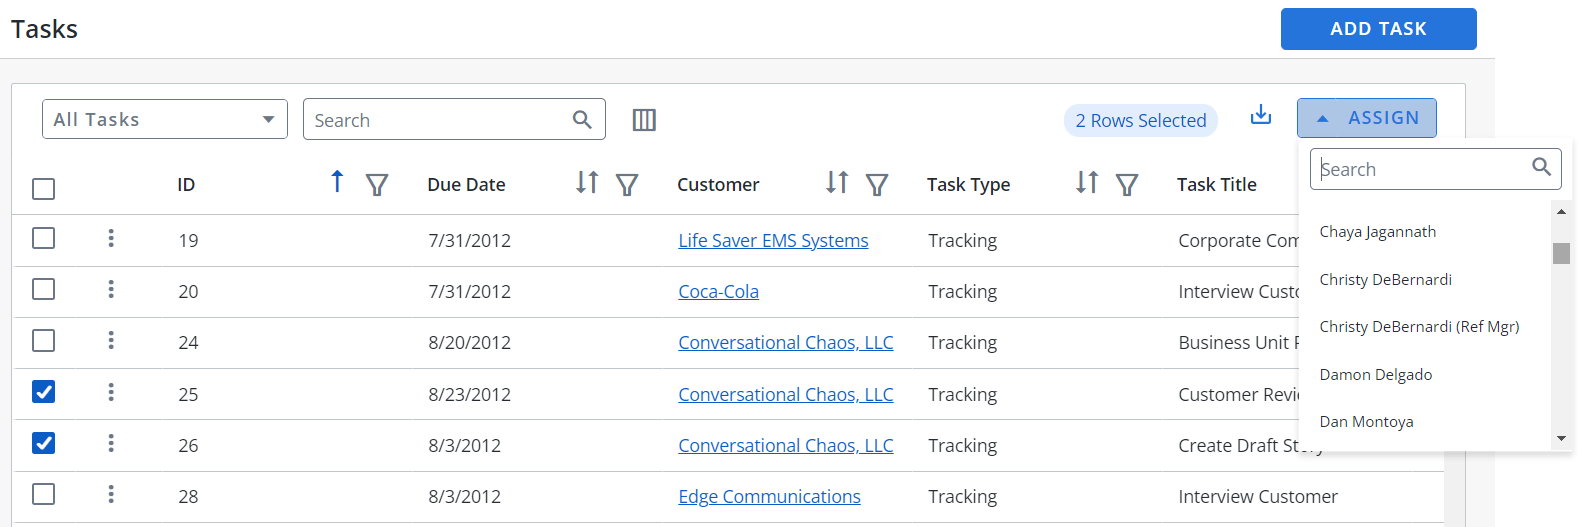
- Select one or more checkboxes to enable the desired Tasks for bulk actions.
- Click Assign. Available assignees will appear in the drop-down menu.
- Choose the user that will be reassigned to the selected Tasks.
Note: Select the checkbox in the header to enable all Tasks for bulk actions.